Bitaxe Setup Guide

Welcome to the Bitaxe Setup Guide
This guide will help you set up your Bitaxe Bitcoin Miner, including the Ultra, Supra, and Gamma models, in just a few minutes. Whether you're a beginner or an experienced miner, this step-by-step tutorial will provide you with all the information you need to get started.
1
Connect Your Bitaxe
- Plug in the Bitaxe: Connect the device to the included power adapter.
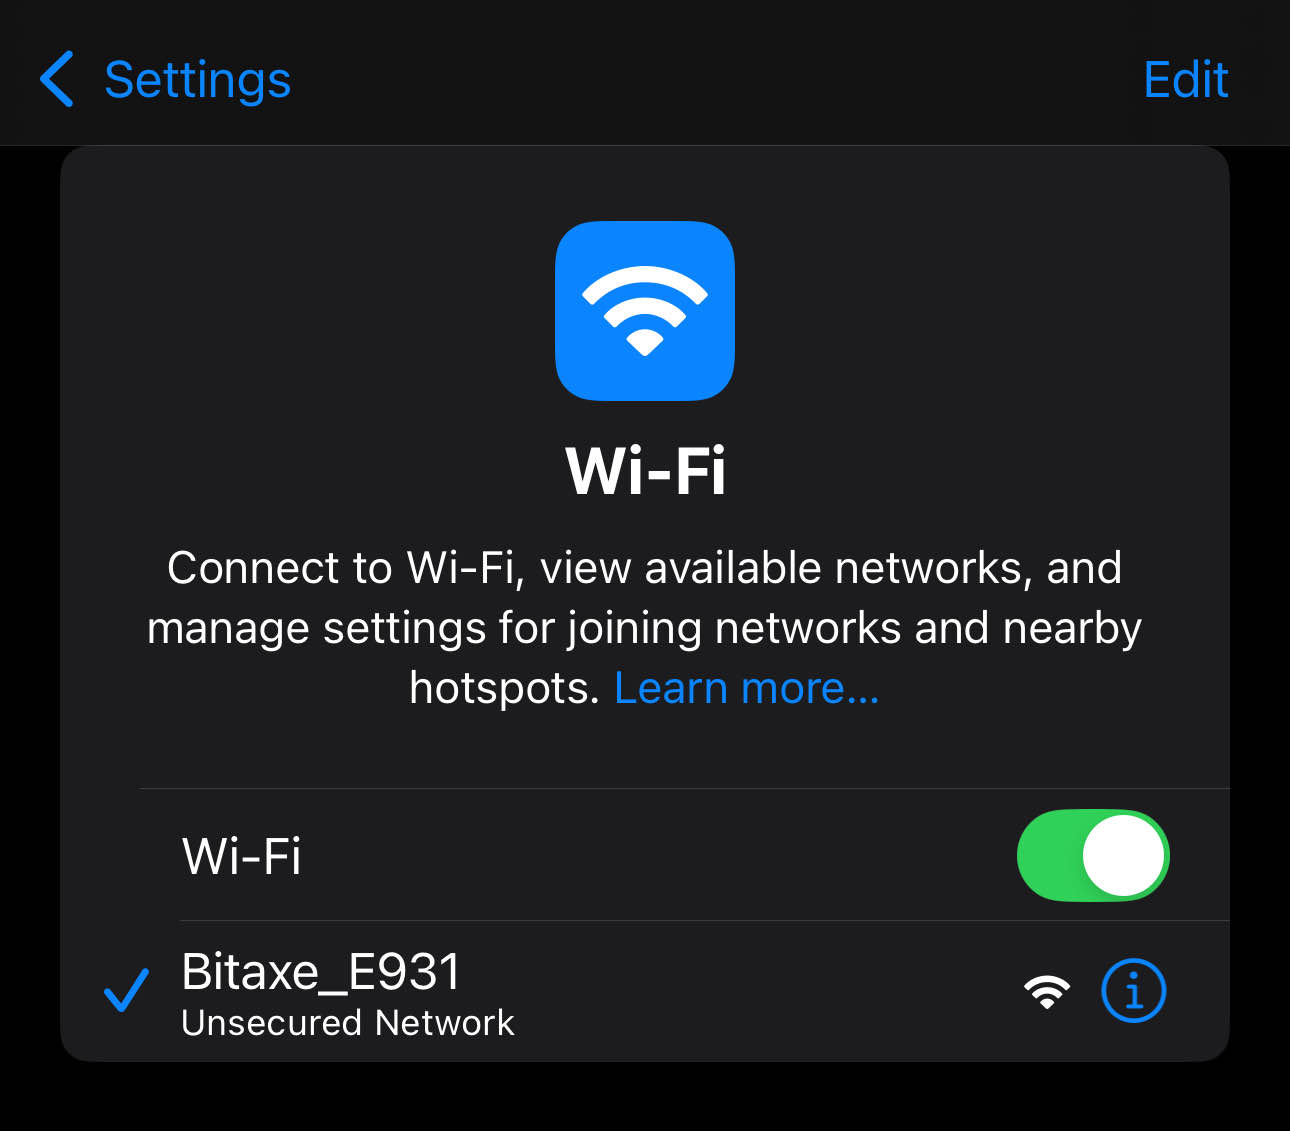
- Wait for WiFi: Your Bitaxe will start emitting a new Wi-Fi network with a name something similar to 'Bitaxe_ED53'. The correct network name will be displayed on the Bitaxe screen.
- Connect to Bitaxe WIFI: Use your phone or laptop to access the available WiFi networks. Locate and select the Bitaxe WiFi network name shown on the Bitaxe display and connect. Once connected to the Bitaxe WiFi the settings page will open automatically.
3
Network Configuration
-
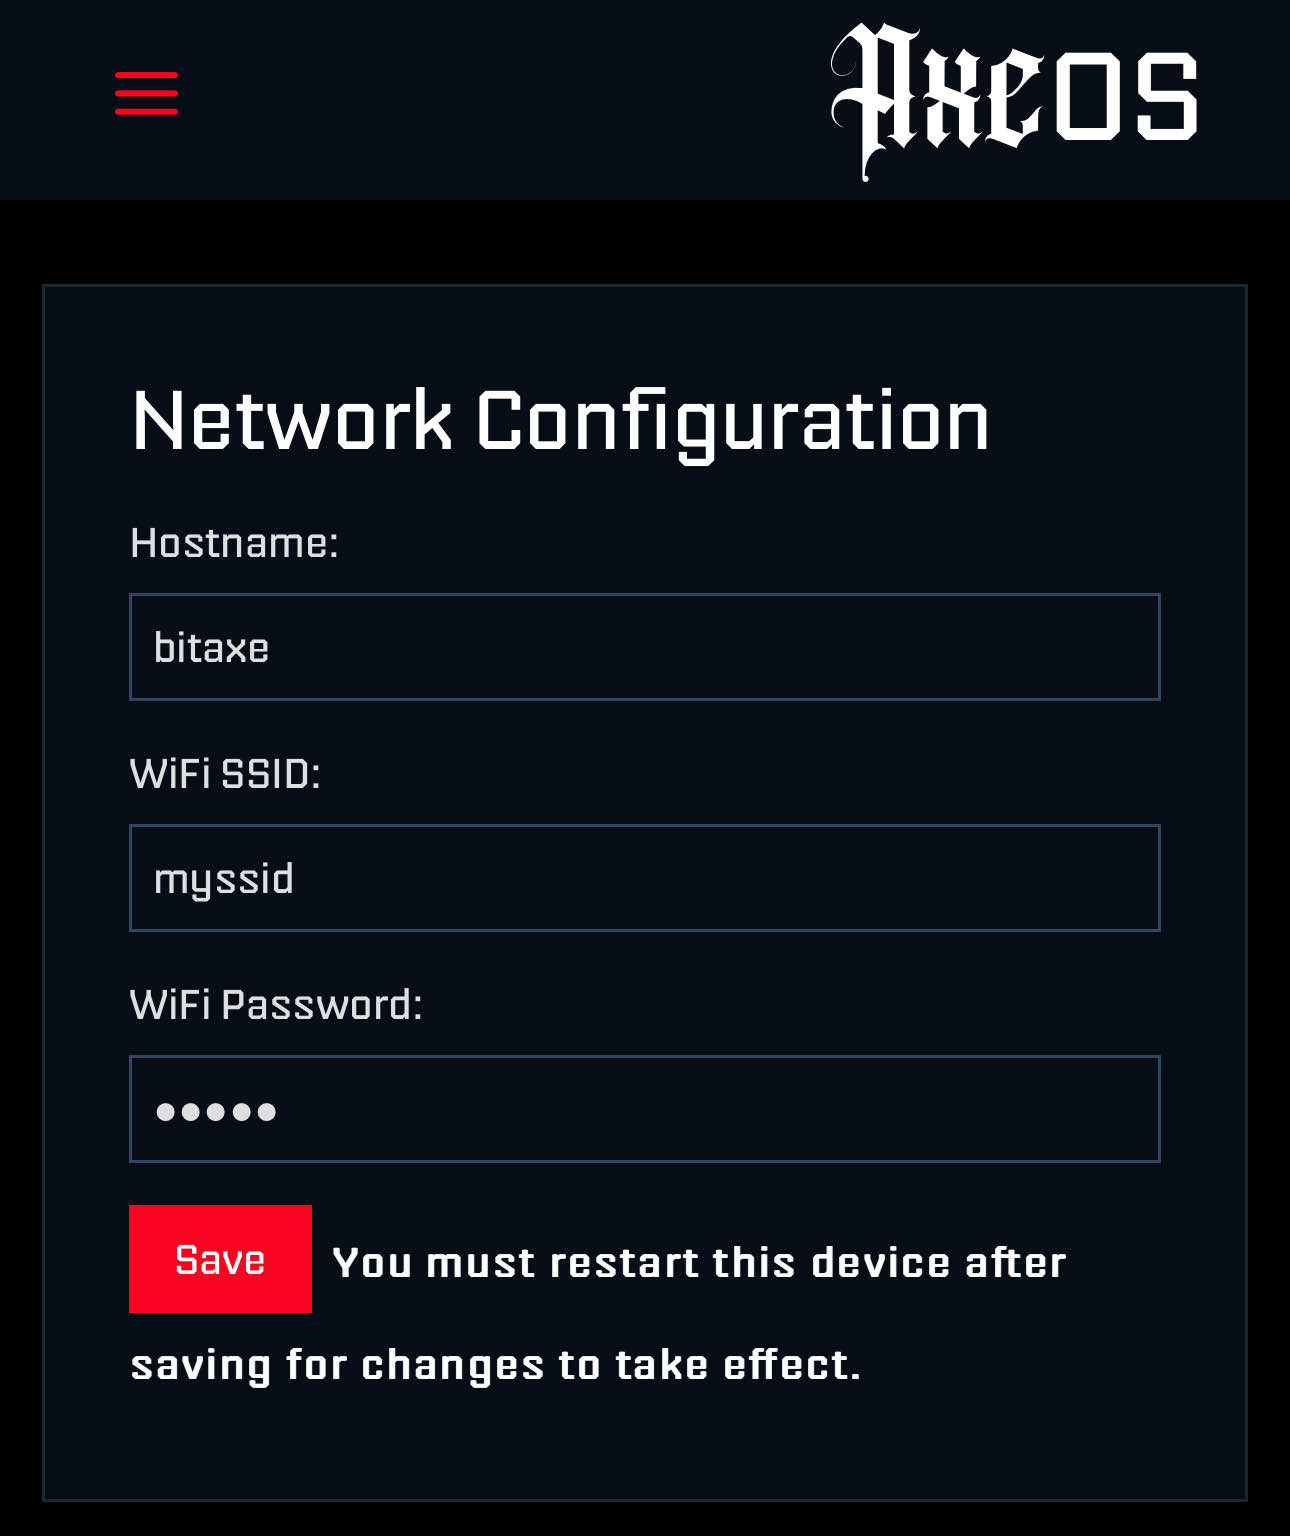
Access the options menu by clicking the three bars in the upper left corner.
-
Go to: "Network" tab.
-
Set a hostname: Set a name for your Bitaxe.
-
Set WIFI SSID: Set it to the exact name of your home WIFI.
-
Enter the password: The password of your home WIFI.
-
Click "Save": and restart your Bitaxe.
General Settings
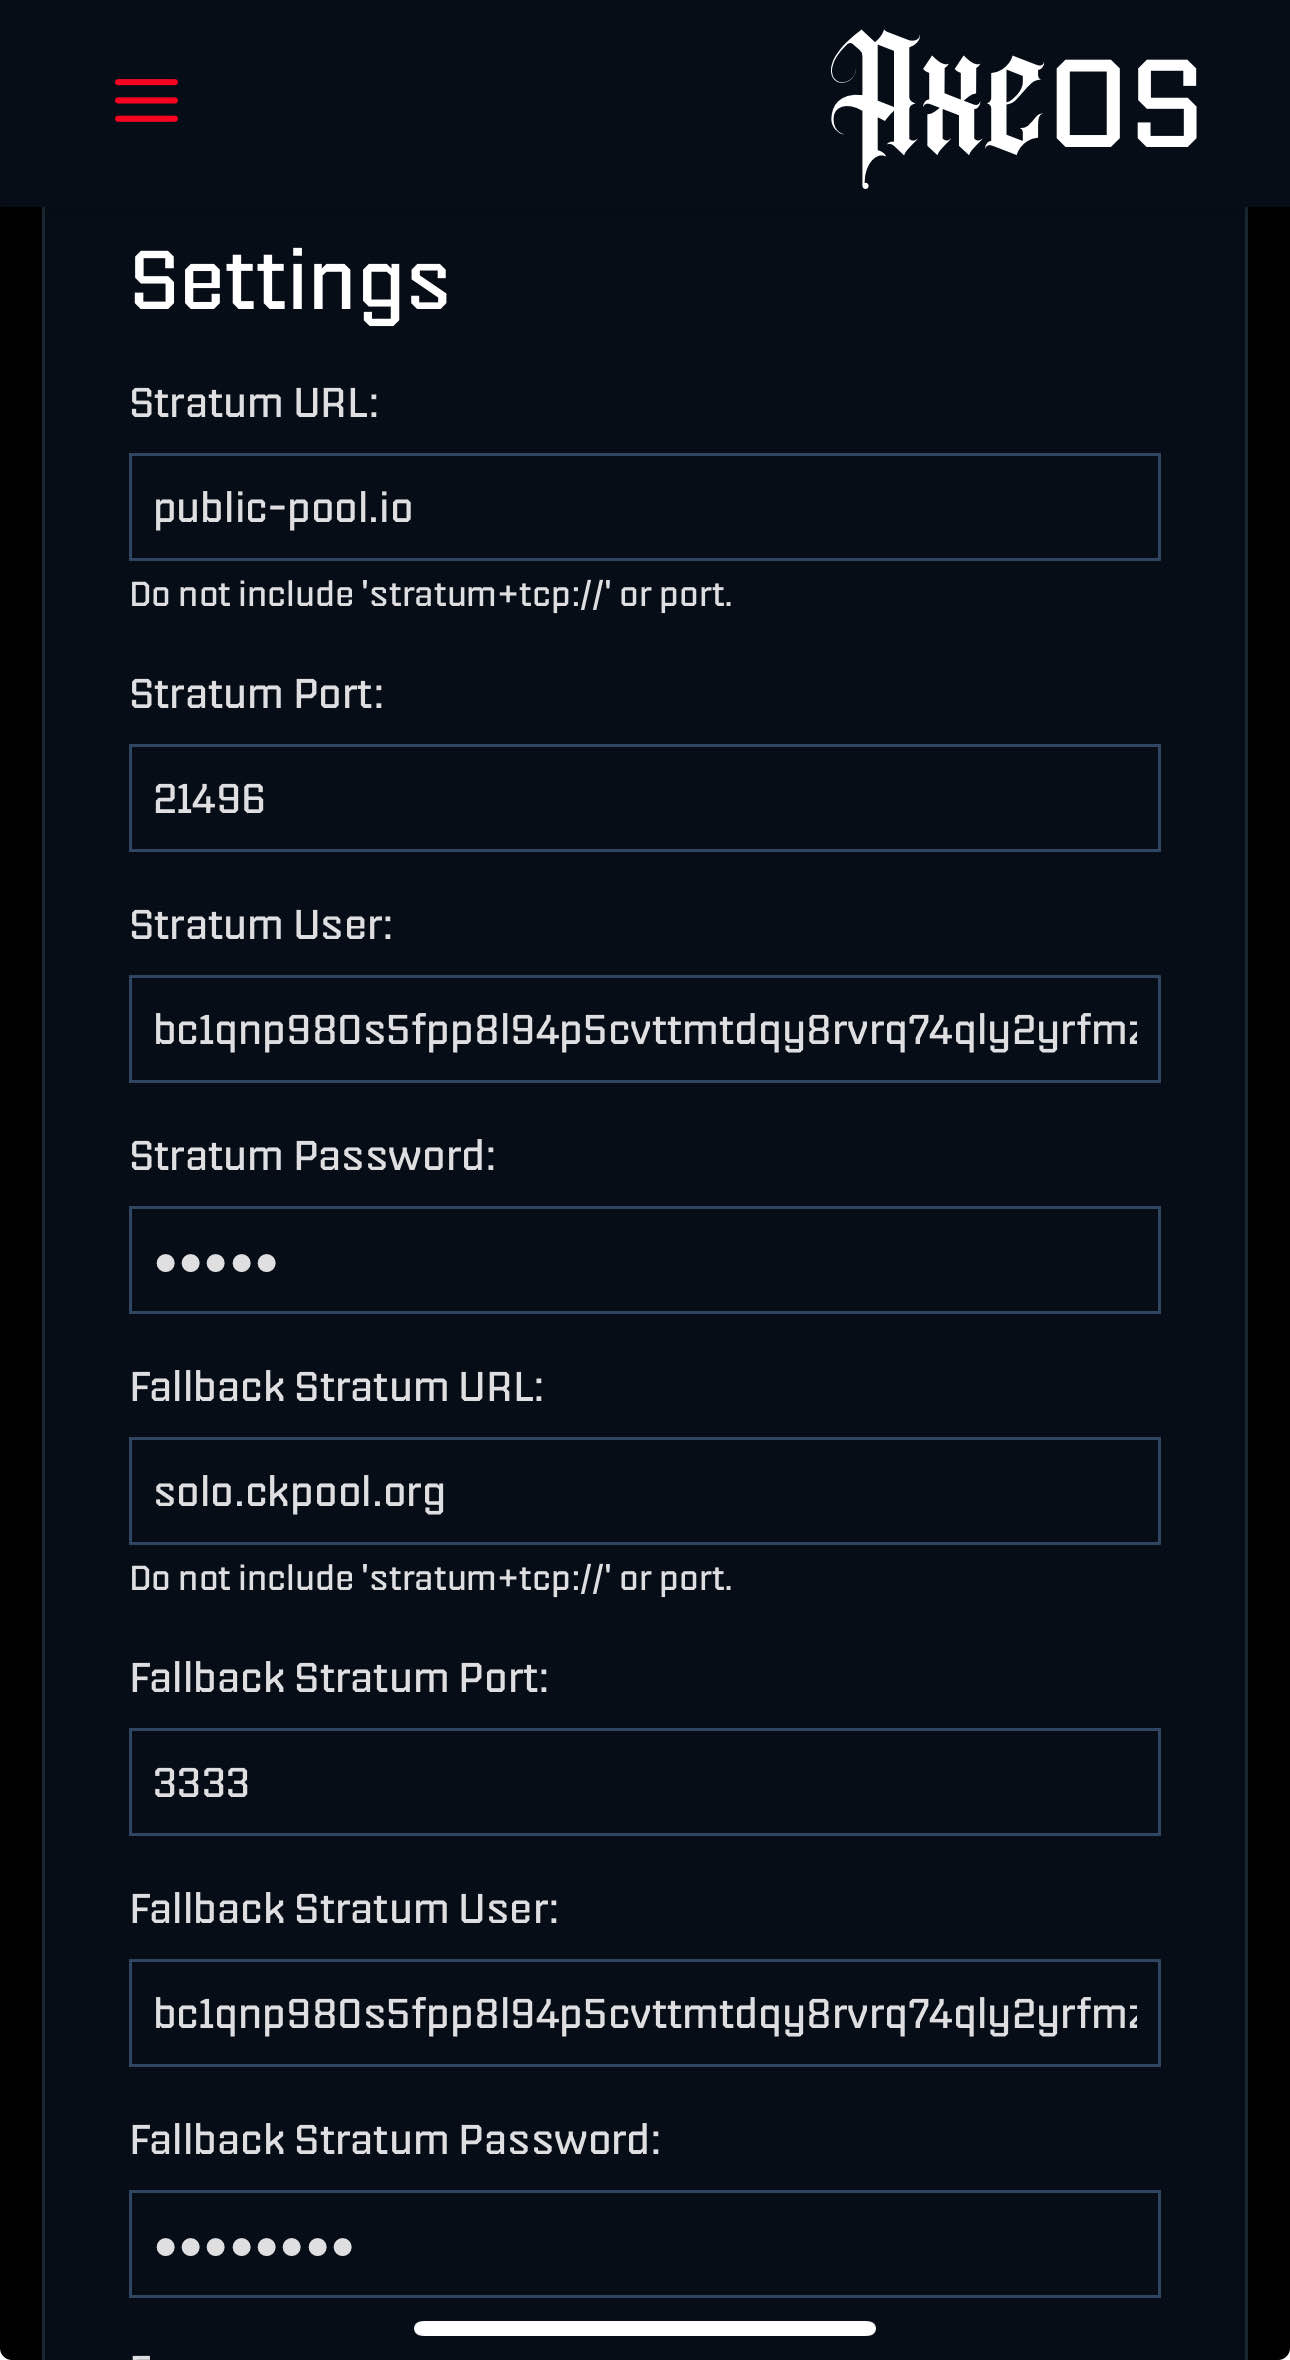
Now that your Bitaxe is connected to your home network, it's time to complete the initial setup. This includes configuring essential settings, such as your mining pool and the Bitcoin wallet where rewards will be sent if your miner successfully finds a block.
5
Initial Setup
- Set primary Mining Pool: We recommend using Publi-Pool.io for solo mining, but you are free to choose any other mining pool that suits your preferences.
- Enter Port: Make sure to configure the correct port for your chosen mining pool provider.
- Set Stratum User: As a user, you need to set your Bitcoin address. This ensures the mining pool can correctly identify and credit your rewards.
- Set Fallback: You can configure a fallback pool to ensure your Bitaxe continues mining seamlessly if your primary pool becomes unavailable.
- Reboot: Reset the Bitaxe with the "Reset" button or disconnect it from Power.
PRO TIP
Did you know? For the most private and sovereign setup, you can easily run your own mining pool by hosting a Bitcoin node with Liquidbox.
Table of content
Related Posts
26
Jul
A Battle of David vs Goliath: Tiny 500 GH/s Bitaxe Finds Bitcoin Block Against All Odds
-
Posted by
Cory Kyle
- 0 comments
1 in 1.1 Billion: Bitaxe Finds Bitcoin BlockIn a remarkable turn of events that has sent shockwaves through the Bitcoin...
04
Jun
How-To Guide: 6 simple steps to set up your Nerdminer
-
Posted by
Cory Kyle
- 0 comments
Welcome, now you are one of us
This how-to guide will walk you through the process of setting up your...
23
May
What is Solo Lottery Bitcoin Mining and why everyone should know about it?
-
Posted by
Cory Kyle
- 0 comments
Digging for Digital Gold: An Introduction to Solo Lottery Bitcoin Mining
Bitcoin mining is the backbone of the Bitcoin network....
26
Aug
Bitaxe: Open Source Bitcoin Mining
-
Posted by
Cory Kyle
Bitaxe is the first fully open source hardware Bitcoin ASIC miner.
In the dynamic realm of cryptocurrencies, Bitwater Technologies LLC stands...
25
Aug
Why You Should Run Your Own Bitcoin Node
-
Posted by
Cory Kyle
There are many reasons to run your own Bitcoin node. In the ever-evolving world of cryptocurrency, where innovation and decentralization...


